

 10526
10526
Introduction
You may connect your Pro Plus™ system to the cloud either via Wi-Fi or using an Ethernet cable. If you plan to use Ethernet, skip to the bottom of this article.
Wi-Fi Configuration
When the Pro Plus™ system powers up, it displays a logo page, followed by the Main Page (shown below). In addition to displaying system status, the Main Page provides access to settings and help.

To access the Wi-Fi Configuration Page, click on the gear icon in the upper-right corner of the Main Page. The PIN Validation Page will display first.
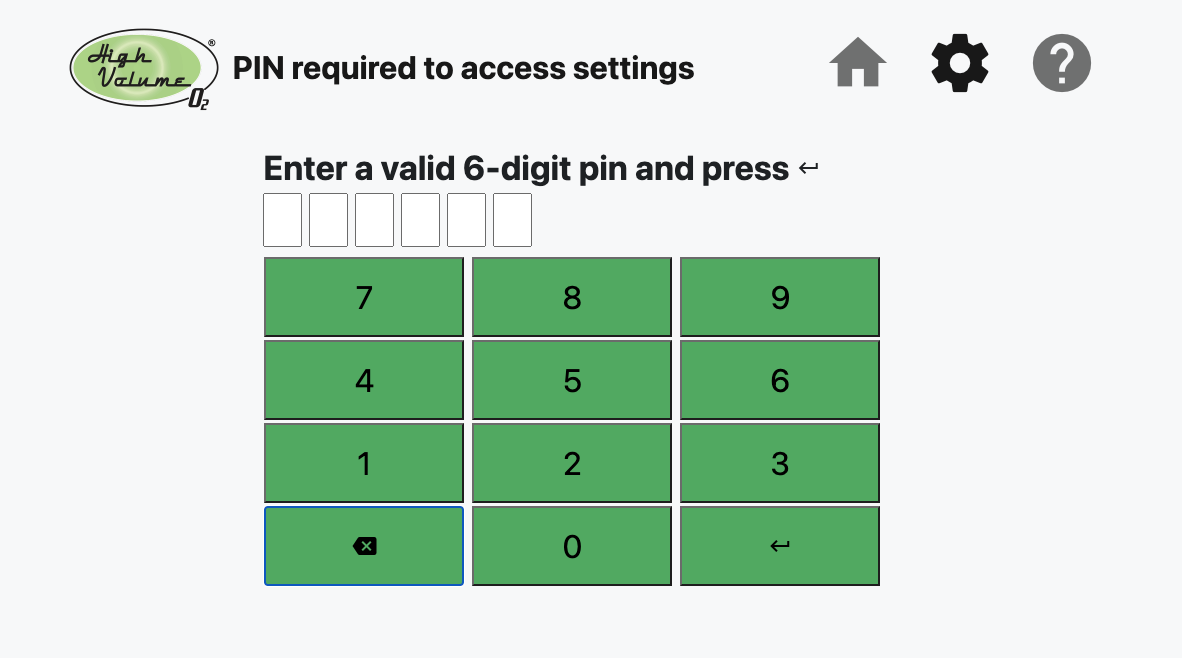
Because oxygen is a critical resource, a 6-digit Personal Identification Number (PIN) code is required to access the Settings Page. By default, the PIN code is all zeroes. You can change the PIN code on the Settings Page. If you forget the PIN code, contact HVO to have them provide a temporary pin. After you enter the PIN code, you must press the 
key to erase previously entered digits.
The Settings Page presents a menu of icons that provide access to settings for Wi-Fi configuration, International language and units of measurement, Colors & Limits to configure font colors, PSI warning levels, and to Change your PIN. For the purpose of this article, we are only concerned with the Wi-Fi configuration function.

To begin configuring Wi-Fi, touch the Wi-Fi icon and the system will look for Wi-Fi networks that are in the immediate vicinity. It will take about 10 seconds to find all available networks, during which a spinner will rotate:

When it finishes searching, you’ll see a page like the one shown below:

NOTE: If you don’t see any networks in the dropdown list, try clicking on the Refresh button, to initiate a new network search. If no networks are found after the second try, this means that there are no Wi-Fi networks within range of the HVO System.
Look for the network you want to connect to and select it. Then touch the Password entry field, which will cause the on-screen keyboard to appear:

Enter the Wi-Fi password, then touch the light green enter key to apply changes. The page will display the message “Wi-Fi changing to <your network>” and the spinner will spin until the operation has completed.
After you click the “Continue…” button, you’ll be returned to the Home Page, where an IP address will be displayed. The connection status should indicate “Connected/Active”. If the second part of the status is “Inactive”, contact HVO to have them activate your system.
NOTE: There may be a short delay before the new network information appears on the Main Page. Wait about 30 seconds before deciding if the operation succeeded.
Ethernet Configuration
You may use an Ethernet cable instead of WiFi using the steps below:
- Turn off the power to the HVO system
- Run an Ethernet cable through the hole in the bottom of the headbox
- Plug the jack into the Ethernet port that is located on the touchscreen module. The system will automatically detect the Ethernet connection and begin to communicate with the cloud.
Activate Your System
The final step is to contact your HVO representative to confirm that data is reaching the Seeing Eye service. You can do this by calling HVO at (402) 476-0555 or by emailing [email protected] with the subject “Activation needed for <your organization name>”.

